
How to Set Up a Multi-Level BOM for a Product With Sub-Assemblies
A step-by-step build of a multi-level BOM for a product with sub-assemblies, using one worked example the whole way through. Covers which sub-assemblies earn their own BOM, how to number the levels, why quantities are per parent and not per finished unit, and how to check the explosion before you buy anything.
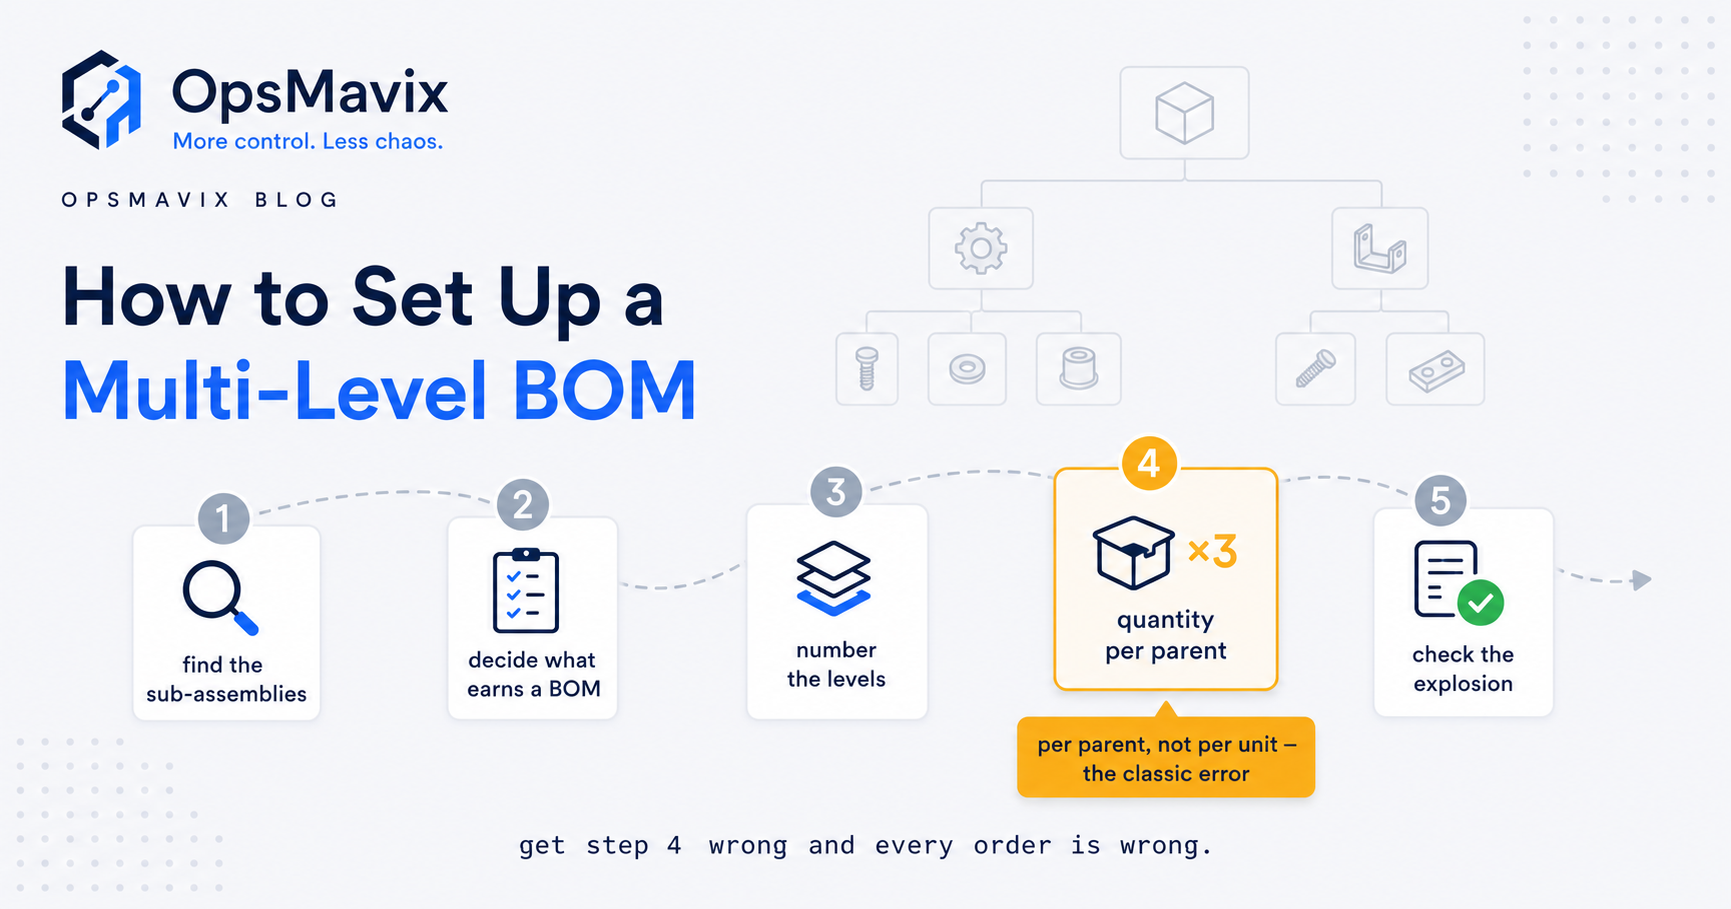
If you are working out how to set up a multi-level BOM, the short answer is to build it from the bottom up: give every sub-assembly you stock, build separately, buy made up, share or sell its own part number and its own bill of materials, then enter each component quantity per immediate parent rather than per finished unit. Finally, explode the structure for a real build quantity and check the totals against a physical unit before anyone raises a purchase order.
The difficulty is rarely the concept. Most people know a finished product contains sub-assemblies and those contain parts. The trouble is procedural: which groups get their own BOM, what the quantity column means, and what happens when two products share a sub-assembly. Get those wrong and the structure looks tidy on screen while quietly ordering twice the filter cartridges you need.
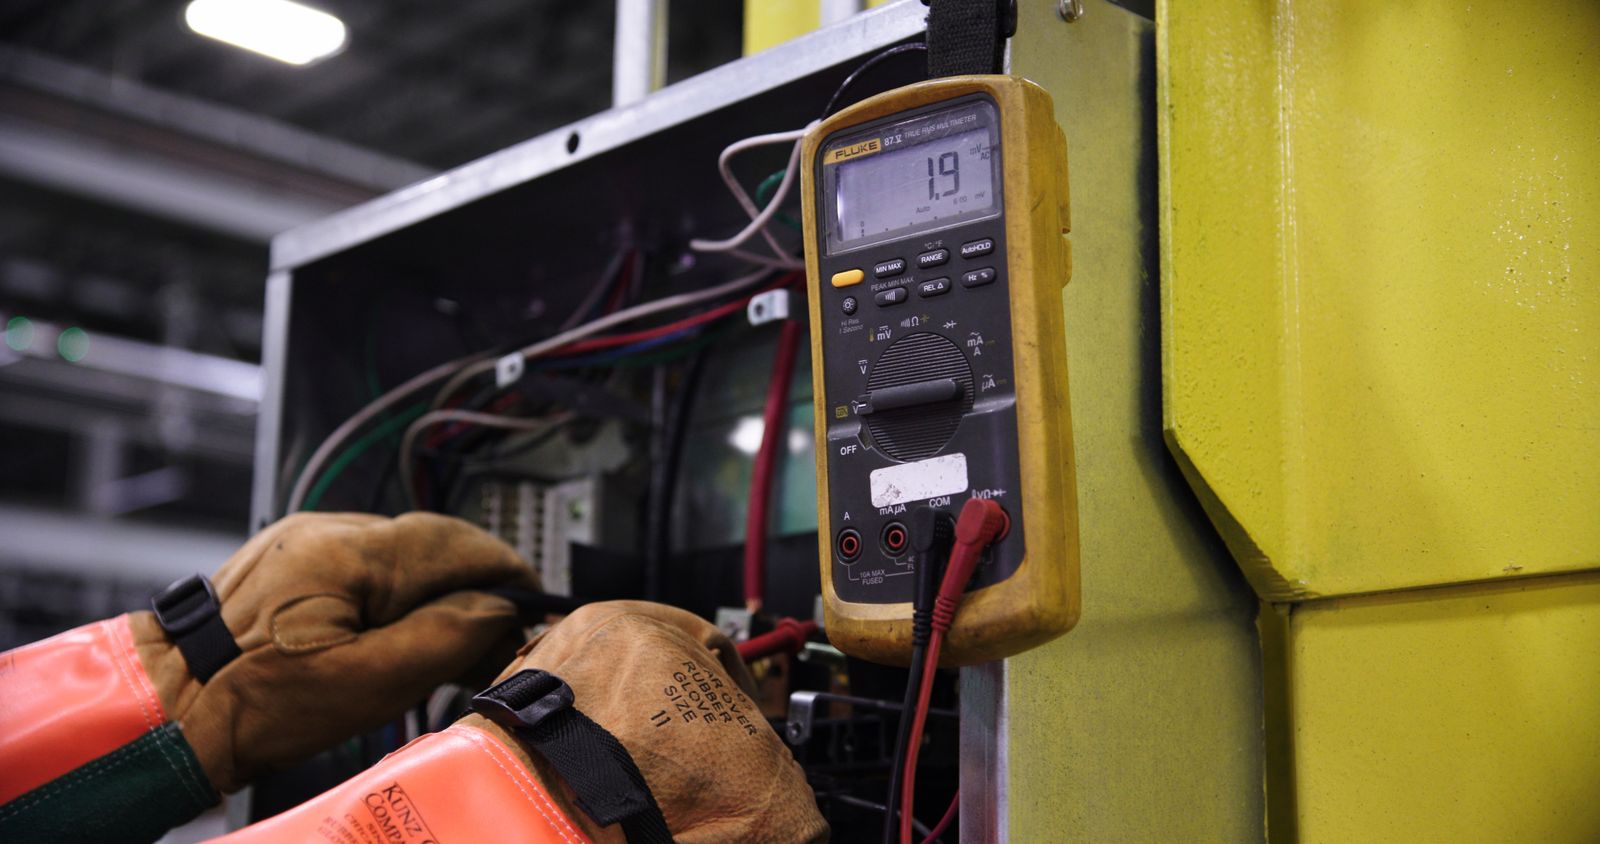
A wired control panel is a typical sub-assembly that deserves its own BOM. Illustrative photograph, not an OpsMavix project.
Image credit: Onics Energy, Pexels License. No edits.
Key Takeaways
- Map the BOM to how the product is built and stocked, not to the CAD tree.
- A sub-assembly earns its own BOM only if you stock, build, buy, share or sell it on its own.
- Each BOM describes one level; depth comes from BOMs referencing other BOMs.
- Quantity per means per immediate parent, never per finished product.
- Shared sub-assemblies need where-used checks and a new part number for any variation.
- Explode the structure for a real batch and reconcile it against a physical unit before buying.
In this guide:
- 1. Map the Product the Way You Build It
- 2. Decide Which Assemblies Earn Their Own BOM
- 3. Give Every BOM One Level and One Parent
- 4. Build the BOMs From the Bottom Up
- 5. Set Quantity Per Parent Not Per Finished Unit
- 6. Check Units, Scrap and Consumables
- 7. Handle Shared Assemblies Safely
- 8. Explode and Check Before You Buy
- Frequently Asked Questions
- How OpsMavix Can Help
1. Map the Product the Way You Build It
Introduce the worked example
The hypothetical example used throughout is a mobile welding fume extractor, the MFE-450: a wheeled cabinet with a filter housing, a fan and motor pack, a control panel and an extraction arm. The same imaginary manufacturer also builds an MFE-900 twin-housing version and a DE-300 bench dust extractor, and two sub-assemblies are shared across them. Every part number, quantity and price below is illustrative; the point is the structure.
Walk the build before opening a system
Before touching a spreadsheet or an MRP system, walk the build and note each point where a group of parts becomes a thing with a name. For the MFE-450 there are five:
- Someone welds and powder coats a chassis and fits castors.
- Someone makes up a wiring loom on a jig.
- Someone fits and wires a control panel.
- Someone bolts the motor to its mount plate and fits the impeller.
- Someone fits cartridges and gaskets into a housing shell.
Each is a stopping point where a part-finished item can sit on a shelf overnight. Those stopping points are the candidates for levels.
Mirror production, not engineering
Engineering groups parts by function; production groups them by the order in which hands touch them. If you copy the CAD tree across unchanged, you get levels nobody ever builds, issues or counts. The difference between the two views is covered in engineering vs manufacturing BOM. For setup, start from the manufacturing view.
Write the map as an indented list; paper is fine. Ask one question of each group: does anything ever happen to this group on its own?
2. Decide Which Assemblies Earn Their Own BOM
Apply five tests
Not every cluster of parts deserves a level. A sub-assembly earns its own BOM if at least one of these is true:
| Test | What it looks like on the floor | MFE-450 example |
|---|---|---|
| You stock it | It has a shelf location, a count and a stock figure | Chassis |
| You build it separately | It has its own works order or is made in batches | Filter housing, fan pack, wiring loom |
| You buy it made up | A supplier delivers it as one purchase order line | Extraction arm |
| It is shared | Two or more products consume it | Chassis (DE-300), control panel (MFE-900) |
| You sell it | It goes out as a spare or service exchange unit | Control panel |
Odoo’s documentation makes the same point about sharing: sublevel BoMs are beneficial when the subassembly is used across multiple finished products, because they then appear on several top-level BoMs.
Treat bought-in assemblies as components
The extraction arm passes the “buy it made up” test, but you never open it. It stays a purchased component with no BOM beneath it. Only create a BOM below an item if you assemble that item yourself.
Keep everything else on the parent
If none of the five tests apply, keep the parts on the parent BOM. A level that exists only for tidiness costs a part number, a stock record, a transaction at build time and one more place for errors to hide. If you still want a grouping visible without stocking it, that is the job of a phantom or kit structure; BOM levels explained covers phantoms and how deep to nest.
For the MFE-450 the result is four level 1 sub-assemblies (chassis, filter housing, fan pack, control panel) plus one level 2 sub-assembly (the wiring loom inside the panel). That gives a structure three levels deep below the finished product.
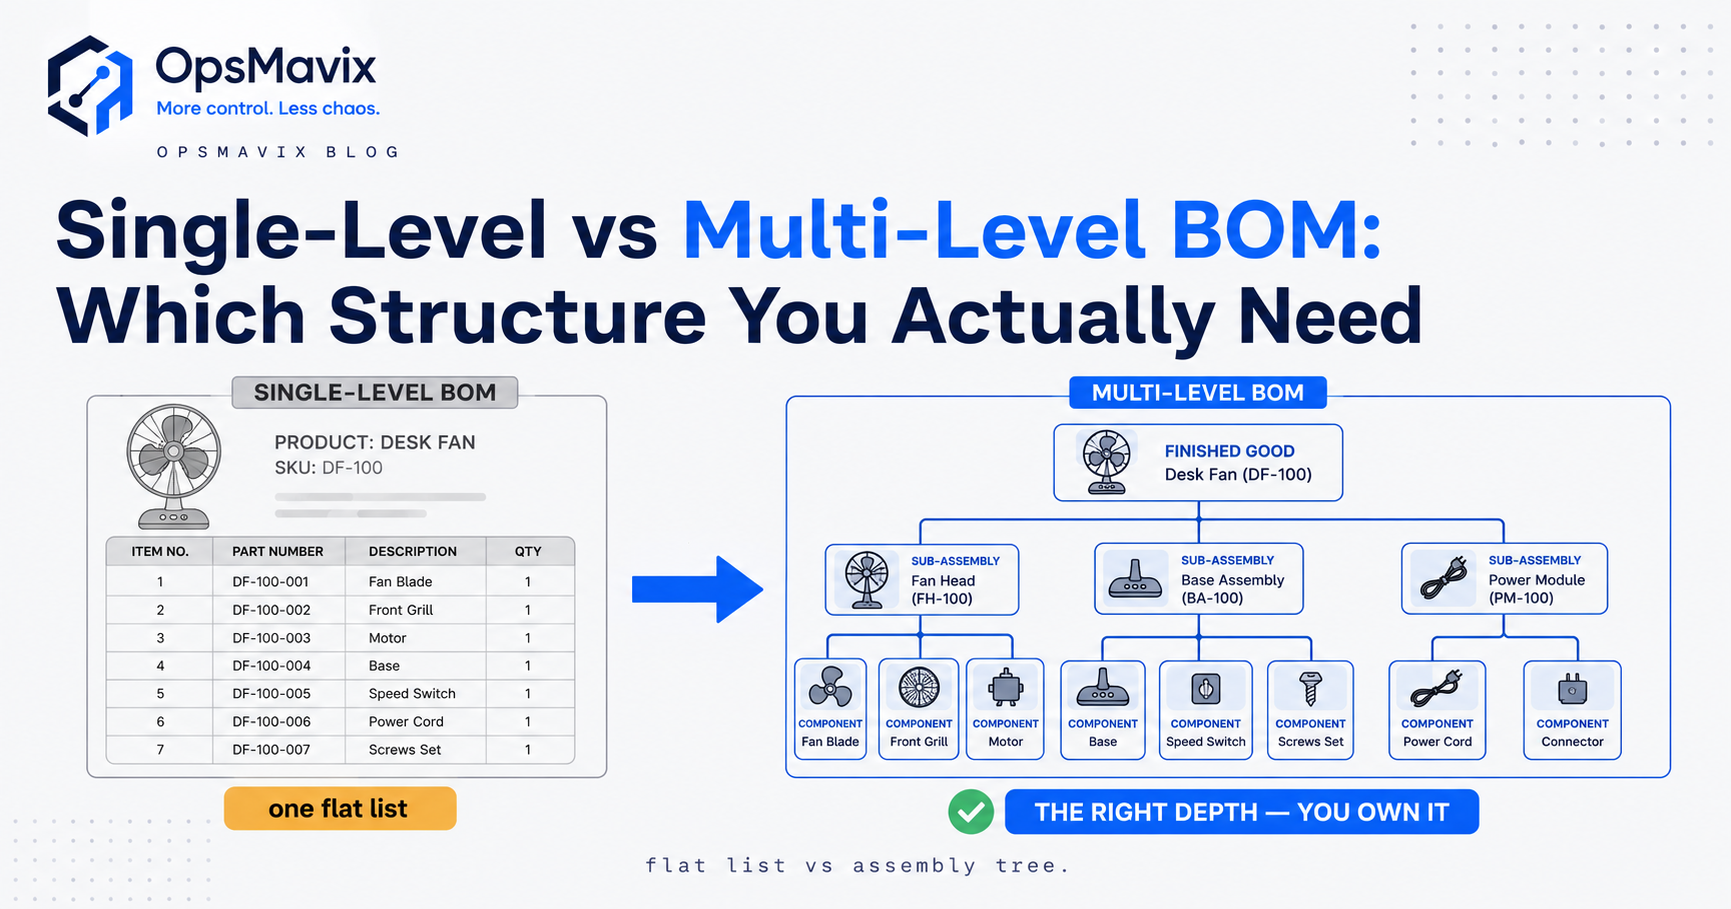
If you build one product from loose parts in one continuous operation, with nothing stocked part-finished, a single-level BOM may be the right answer. The trade-off is compared in single vs multi-level BOM.
3. Give Every BOM One Level and One Parent
Number the levels downwards
Level 0 is the sellable product. Level 1 is everything consumed directly to make it. Level 2 is everything consumed to make the level 1 items, and so on down to purchased parts and raw materials. That convention is common to most systems.
Understand the mechanism underneath
The part that decides whether your setup works is that each BOM describes one level only. Microsoft’s Dynamics 365 documentation puts it plainly: a single BOM describes a single level that is identified by a unique ID, and components might have their own BOMs. Depth is not a longer list; it is BOMs pointing at BOMs.
So the MFE-450 BOM does not list every screw. It has six lines: four sub-assemblies, the bought-in arm and a fastener kit. The remaining parts appear only when the structure is exploded.
Use this as a quick audit
If the level 0 sheet of an existing BOM runs to dozens of rows with indentation in the first column, it is probably a flat parts list dressed up as a multi-level BOM. It will behave like a single-level BOM, and none of its sub-assemblies can be shared with another product.
| Symptom | What it usually means | Fix |
|---|---|---|
| Level 0 lists every screw | Flat list with indentation | Create sub-assembly items and BOMs |
| Same parts copied into two product BOMs | Sub-assembly duplicated, not referenced | Create one shared item and reference it |
| Sub-assembly has no stock record | Level exists on paper only | Decide whether it passes the five tests |
4. Build the BOMs From the Bottom Up
Follow the order the systems recommend
Create the lowest-level BOMs first, then use those items as components on the level above. Odoo’s documentation gives exactly this instruction: if starting from scratch, build the BoMs from the bottom up, starting with the lowest-level product BoMs and then including those products as components in higher-level BoMs.
Why the order matters
Start at level 0 and every sub-assembly line points at a part number that does not exist yet. You either create stub records you later have to fix, or leave the line blank and forget it. Working upwards, everything you reference already exists with a unit of measure, a cost and a supplier.
For the MFE-450 the creation order is:
- Purchased parts and raw materials (cable, ferrules, castors, cartridges and so on).
- The wiring loom SA-LOOM-01.
- The control panel, fan pack, filter housing and chassis.
- The finished MFE-450.
Set lead times where they belong
Odoo’s guidance also notes that vendor lead times apply to purchased components at any level except the final product, and manufacturing lead times apply to items built from a BoM at any level except the lowest. Enter them as you create each item, not afterwards, so the first planning run uses realistic dates.
5. Set Quantity Per Parent Not Per Finished Unit
Read the quantity column correctly
This is the error that causes the most damage, and it is silent. The quantity column means: how many of this component go into one of the item this BOM belongs to. Oracle’s JD Edwards World documentation defines Quantity Per as a number that indicates how many components you use to manufacture the parent item. The parent item, not the end product.

Each sub-assembly BOM should describe one unit of that sub-assembly only. Illustrative photograph, not an OpsMavix project.
Image credit: ThisIsEngineering, Pexels License. No edits.
Hypothetical worked example of the error
The filter housing takes 3 cartridges. The MFE-900 uses 2 housings, so a finished MFE-900 contains 6 cartridges. Someone edits the housing BOM while thinking about the MFE-900 and types 6 into the cartridge line. Suppose the plan is 40 MFE-450s and 15 MFE-900s:
| Product | Build qty | Housings per unit | Cartridges with correct BOM (3) | Cartridges with wrong BOM (6) |
|---|---|---|---|---|
| MFE-450 | 40 | 1 | 120 | 240 |
| MFE-900 | 15 | 2 | 90 | 180 |
| Total | 210 | 420 |
Both products are now overstated by exactly 100%. Nothing errors. Purchasing buys 210 cartridges too many, stock builds up, and the variance surfaces later as a stocktake discrepancy nobody can explain.
Habits that prevent it
- Edit each BOM with only its own parent in mind. On the filter housing BOM, the only object that exists is one filter housing.
- State the base quantity. If some BOMs are per 1 and others per batch, say so at the top. JD Edwards, for example, has a separate batch quantity field for bills that vary by batch size.
- Accept fractional quantities. 0.4 kg of powder coat per chassis is a real line; rounding it to 1 inflates cost on every unit.
6. Check Units, Scrap and Consumables
Remember that errors multiply
A multi-level BOM multiplies down every branch. A mistake at level 3 is multiplied by the quantity at level 2, then again at level 1, then by the build quantity. Check three things on each BOM before moving up a level.
Three checks per BOM
- The stocking unit matches the BOM unit. If cable is stocked in metres and someone enters the loom line as 3,200 thinking in millimetres, a batch of 40 asks for 128,000 m instead of 128 m. If you buy on drums and issue by the metre, hold the conversion in the system, not in someone’s head.
- Scrap and yield sit where the loss happens. If cutting gaskets loses material, put the allowance on the gasket line of the housing BOM, not on the finished product. Check how your system applies it: a straight 5% uplift on 3 gaskets gives 3.15 per housing, while some systems calculate yield differently.
- Consumables are on the BOM or explicitly excluded. Pick one rule for solder, sealant, threadlock and cable ties and apply it everywhere. Half in and half out makes any cost roll-up untrustworthy.
| Check | Wrong | Right |
|---|---|---|
| Unit of measure | Loom cable 3,200 (assumed mm, stocked in m) | Loom cable 3.2 m |
| Scrap location | 5% added to the finished extractor | Allowance on the gasket line |
| Consumables | Threadlock on some BOMs, not others | One documented rule |
7. Handle Shared Assemblies Safely
One BOM, maintained once
Shared sub-assemblies are the main reason to build a multi-level BOM and the main reason it needs care. In the example, the control panel SA-CTL-04 sits on the MFE-450 and MFE-900, and the chassis SA-CHS-01 sits on the MFE-450 and DE-300. When the contactor is superseded, you change one line and every product using that panel follows.
Check where-used before every change
Before changing a shared sub-assembly, answer the reverse question: what does this go into? Oracle’s JD Edwards World documentation describes a Where Used Update program that locates every occurrence of a component and can replace it, change its quantity per assembly or change its effectivity dates across many bills at once. It recommends running it in proof mode first, because it can change many bills in one go.
Create a new part number for any variation
If the MFE-900 needs a modified panel and the MFE-450 does not, create SA-CTL-05. Editing a shared sub-assembly to suit one product is the fastest way to break another. Controlled changes, approvals and effectivity are covered in bill of materials management.
Add demand from every parent
The panel requirement is the sum across every product being built plus spares sold directly. In the hypothetical plan, 40 MFE-450s and 15 MFE-900s each use one panel, and 6 panels are sold as spares, so the requirement is 40 + 15 + 6 = 61 panels. Anything that plans the panel against one product in isolation will under-order.
The assembled structure
| Level | Part | Description | Qty per parent |
|---|---|---|---|
| 0 | MFE-450 | Mobile fume extractor | 1 |
| .1 | SA-CHS-01 | Trolley chassis assembly | 1 |
| …2 | WLD-100 | Chassis weldment | 1 |
| …2 | CAS-B100 | Castor, braked 100 mm | 2 |
| …2 | CAS-U100 | Castor, unbraked 100 mm | 2 |
| …2 | PC-RAL7016 | Powder coat, textured | 0.4 kg |
| …2 | BLT-M8 | Bolt, M8 x 25 | 8 |
| .1 | SA-FLT-02 | Filter housing assembly | 1 |
| …2 | HSG-450 | Housing shell | 1 |
| …2 | FLT-F9 | Filter cartridge | 3 |
| …2 | GSK-F9 | Cartridge gasket | 3 |
| …2 | LAT-TG | Toggle latch | 4 |
| .1 | SA-FAN-03 | Fan and motor pack | 1 |
| …2 | MTR-15 | Motor, 1.5 kW | 1 |
| …2 | IMP-280 | Impeller, 280 mm | 1 |
| …2 | MNT-PLT | Motor mount plate | 1 |
| …2 | AVM-30 | Anti-vibration mount | 4 |
| .1 | SA-CTL-04 | Control panel assembly | 1 |
| …2 | ENC-IP54 | Enclosure | 1 |
| …2 | CNT-9A | Contactor, 9 A | 1 |
| …2 | SA-LOOM-01 | Wiring loom | 1 |
| …3 | CBL-3C | Cable, 3-core | 3.2 m |
| …3 | FER-15 | Ferrule | 24 |
| …3 | CON-M12 | Connector, M12 | 6 |
| .1 | ARM-3M | Extraction arm, 3 m | 1 |
| .1 | KIT-FAST | Fastener kit | 1 |
Level 0 has six direct lines. Everything else sits one level beneath its own parent.
8. Explode and Check Before You Buy
Run a hypothetical explosion
Exploding a BOM means walking down every branch and multiplying as you go: a level 3 requirement equals its own quantity per parent, times its parent’s quantity per parent, times the build quantity. Not every system stores levels explicitly; Oracle notes that JD Edwards EnterpriseOne keeps BOM data in a single-level format, so the system has to loop through iteratively to get the BOM exploded into a multi-level structure.
For a hypothetical batch of 40 MFE-450s, check a few lines by hand:
| Component | Chain | Expected total |
|---|---|---|
| Castor, braked | 2 × 1 chassis × 40 | 80 |
| Filter cartridge | 3 × 1 housing × 40 | 120 |
| Anti-vibration mount | 4 × 1 fan pack × 40 | 160 |
| Ferrule | 24 × 1 loom × 1 panel × 40 | 960 |
| Cable, 3-core | 3.2 m × 1 loom × 1 panel × 40 | 128 m |
| Powder coat | 0.4 kg × 1 chassis × 40 | 16 kg |
Roll up a hypothetical material cost
Using illustrative unit costs, roll each level into its parent:
| Item | Calculation | Rolled-up cost |
|---|---|---|
| Wiring loom | 3.2 m × £1.25 + 24 × £0.05 + 6 × £4.80 | £34.00 |
| Control panel | £64.00 enclosure + £18.50 contactor + £34.00 loom | £116.50 |
| Chassis | £95.00 + 2 × £14.00 + 2 × £9.50 + 0.4 × £12.50 + 8 × £0.25 | £149.00 |
| Filter housing | £48.00 + 3 × £22.00 + 3 × £1.50 + 4 × £3.25 | £131.50 |
| Fan and motor pack | £135.00 + £42.00 + £16.00 + 4 × £2.75 | £204.00 |
| Extraction arm and fastener kit | £165.00 + £9.00 | £174.00 |
| MFE-450 material cost | Sum of level 1 lines | £775.00 |
That figure excludes labour, overhead and VAT. If a quote has been built on an older, lower material figure, the roll-up shows the gap before it erodes margin on every unit.
Four checks before purchase orders
- Physical reconciliation. Count castors, cartridges and latches on one finished machine and compare against the explosion divided by 40. Most quantity per parent errors surface here.
- Order-of-magnitude scan. Anything 10, 100 or 1,000 times away from a sensible number is usually a unit of measure fault.
- Loop check. No item may appear beneath itself. JD Edwards World, for example, provides an Integrity Analysis program to find a parent listed as a component of itself, and optional online validation that blocks recursive components at entry.
- Version check. Confirm planning uses the approved BOM. In Dynamics 365, a BOM version must be approved before it can be used in planning or manufacturing.
Decide where the BOM should live
| Approach | Where it fits | Limitations to check |
|---|---|---|
| Spreadsheet | One or two products, few shared assemblies | Where-used means opening every sheet; copies drift apart |
| Configure an MRP or ERP you own | The system already supports multilevel BOMs | Setup effort, user training, matching your units and versions |
| Packaged MRP or ERP | Wider planning, purchasing and costing needs | Licence and implementation cost, fit with your shop floor |
| Focused custom application or integration | Specific gaps around BOMs, stock and works orders | Build scope, support and integration with accounts |
Packaged systems such as Odoo Manufacturing and Dynamics 365 support nested BOMs natively; Dynamics 365, for example, lets you display and edit the complete hierarchy in its BOM designer. A business with only a few products may not need that scope, while one with many shared sub-assemblies may outgrow a spreadsheet quickly. Choose based on where-used, versioning and planning needs, not product count alone. The different kinds of BOM a business may need are set out in types of bill of materials, and how the exploded totals become purchase orders is covered in the bill of materials in supply chain management.
Frequently Asked Questions
How many levels should a multi-level BOM have?
As many as you have real stopping points in production, and no more. Each extra level adds a part number, a stock record and a transaction at build time. If a sub-assembly is never stocked, built separately, bought made up, shared or sold, collapse it into its parent.
Is the BOM quantity per finished product or per parent assembly?
Per immediate parent. Oracle’s JD Edwards documentation defines Quantity Per as how many components you use to manufacture the parent item. If a housing takes 3 cartridges and a machine takes 2 housings, the housing BOM says 3, the machine BOM says 2, and the explosion gives 6.
In what order should I create the BOMs?
Bottom-up. Create purchased parts first, then the lowest-level sub-assembly BOMs, then reference those items on the level above until you reach the finished product. Odoo’s manufacturing documentation gives the same guidance.
How do I set up a sub-assembly used in more than one product?
Create it once as its own item with its own BOM, then reference that item as a component on each parent. Do not copy its parts into both. Run a where-used check before changing it, and create a new part number if one product needs a variation.
Should a bought-in assembly have its own BOM?
Usually not. If a supplier delivers it complete and you never open it, treat it as a purchased component. Add a BOM below it only if you assemble or modify it yourself.
What is the difference between a multi-level BOM and an indented BOM?
A multi-level BOM is the structure: BOMs that reference other BOMs. An indented BOM is one way of displaying that structure, with each level shifted to show its parent. You can print an indented view from a properly structured multi-level BOM, but indentation alone does not create one.
How do I check a multi-level BOM is correct?
Explode it for a realistic batch, check several lines by hand, reconcile against a physical unit, scan for unit of measure errors, check for loops and roll up the cost. Do this before the first purchase orders are raised.
Can OpsMavix build a multi-level BOM system?
Yes. OpsMavix can build focused applications or a full custom ERP, and can configure or integrate suitable existing tools where those approaches fit the requirements.
How OpsMavix Can Help
OpsMavix can review how your products are actually built, then define which sub-assemblies need their own BOMs, how shared items are referenced and how explosions feed purchasing and stock.
That may mean configuring a system you already own, connecting BOM data to stock control through inventory automation, or building manufacturing production tracking that issues materials against works orders using the right BOM version.
Contact OpsMavix with one recent product build, the BOM records behind it and the step between BOM and purchasing that creates the most rework. We can use that evidence to define requirements and a practical pilot.
Keep reading
Getting value from OpsMavix? Add us as a preferred source on Google — you'll see more of our operations content in your AI Overviews, AI Mode and Search.